Table of Contents
What is Remote Desktop Connection?
Remote Desktop Connection is the inherent remote control software integrated within the Windows operating system. Its primary function is to enable users to establish connections with specific computers and control them via the Internet. A prime example of its application can be witnessed during technical remote support, where technicians leverage this technology to assume control of the user’s mouse cursor and perform necessary fixes.
Detailed Remote Desktop Connection tutorial for Windows 10, 11 [2 parts]
To comprehend the Windows Remote Desktop Connection tutorial thoroughly, it has been divided into two distinct sections. The initial part entails the setup process of Remote Desktop Connection on both Windows 10 and 11. Subsequently, you will be guided on how to initiate remote access to another computer employing the Remote Desktop Connection feature.
Part 1. Set up Remote Desktop Connection on Windows 10 & 11
To establish Remote Desktop Connection on your Windows 10 and 11 operating systems, you will need to undergo the following three procedures:
-
Allow remote connections to this computer
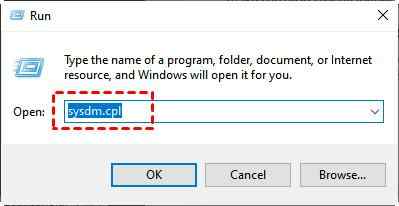
Step 1. On the host computer, simultaneously press the Win and R keys to open the Run dialog box.
Step 2. Within the dialog box, enter “sysdm.cpl” and press Enter.
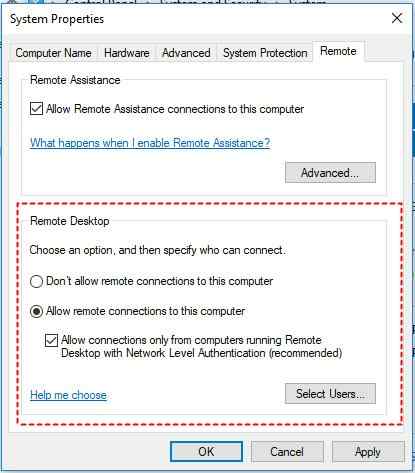
Step 3. Proceed to the Remote tab, select the Allow remote connections to this computer option, and click OK.
-
Changing the Windows Firewall settings
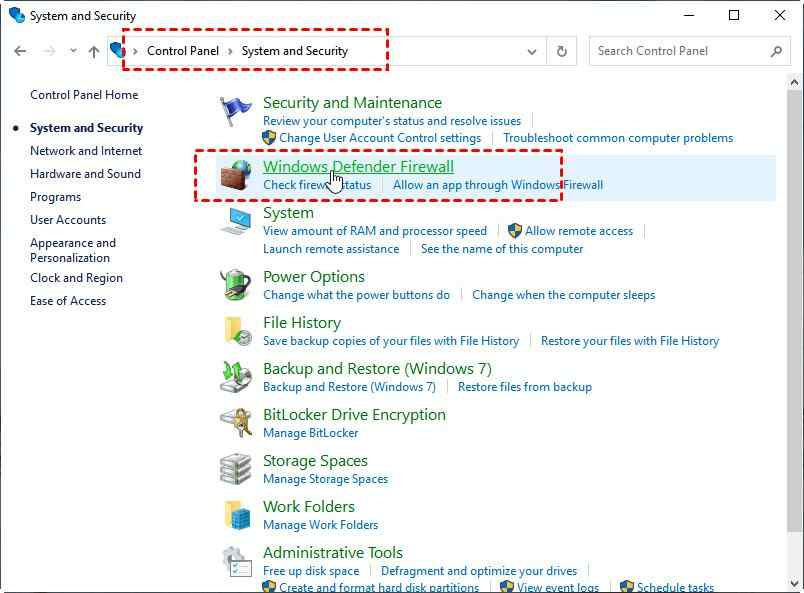
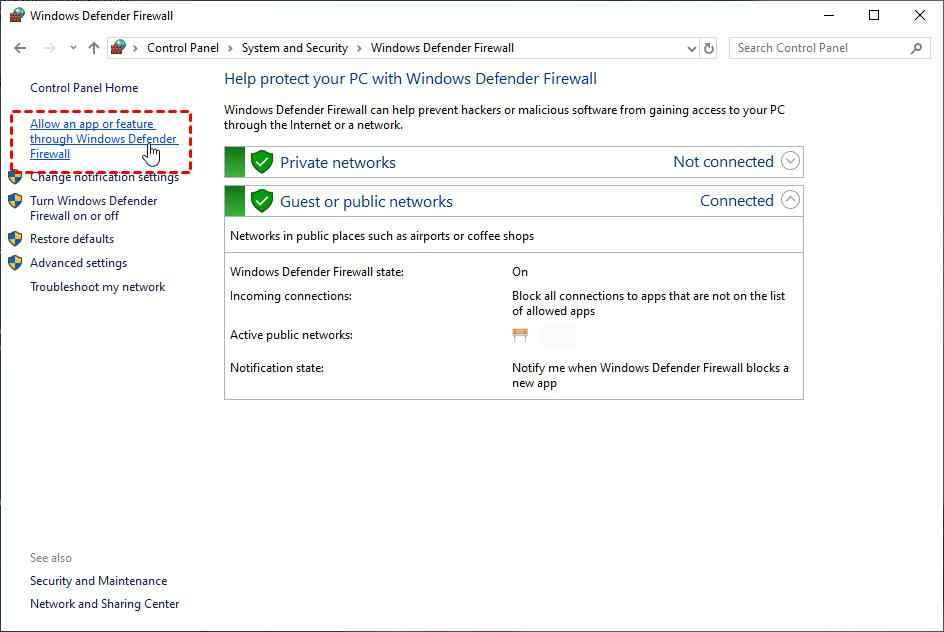
Step 1. On the host computer, open the Control Panel. Go to System and Security > Windows Defender Firewall.
Step 2. Locate and click on Allow an App or Feature Through Windows Defender Firewall.
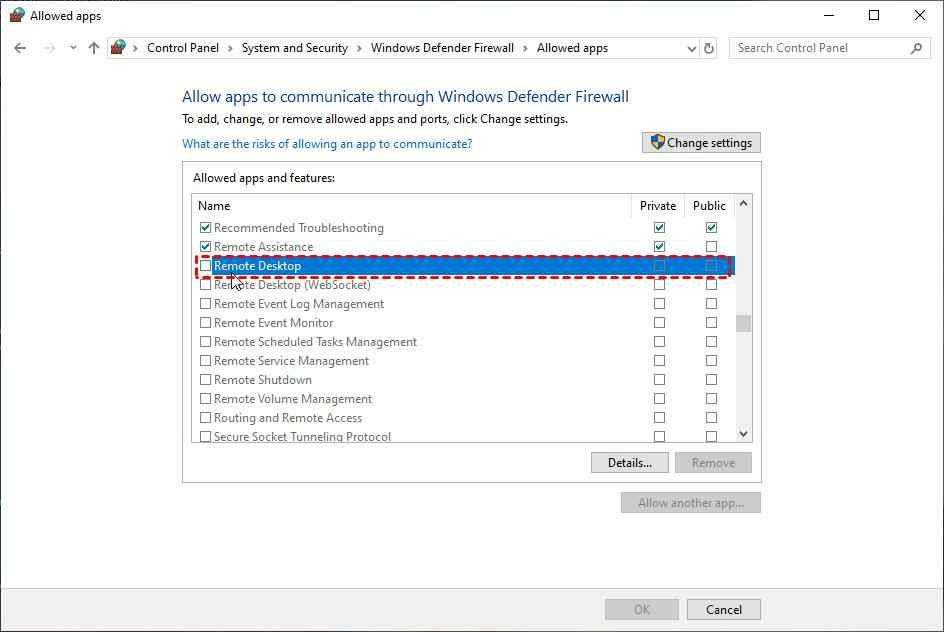
Step 3. Scroll through the list of applications and features, locate Remote Desktop, ensure that the corresponding checkbox is marked, and click OK.
-
Get the IP address and PC name
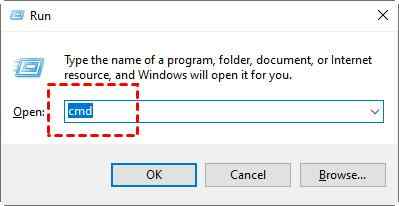
Step 1. Open the Run dialog box. Type “cmd” and press Enter to initiate the Command Prompt.
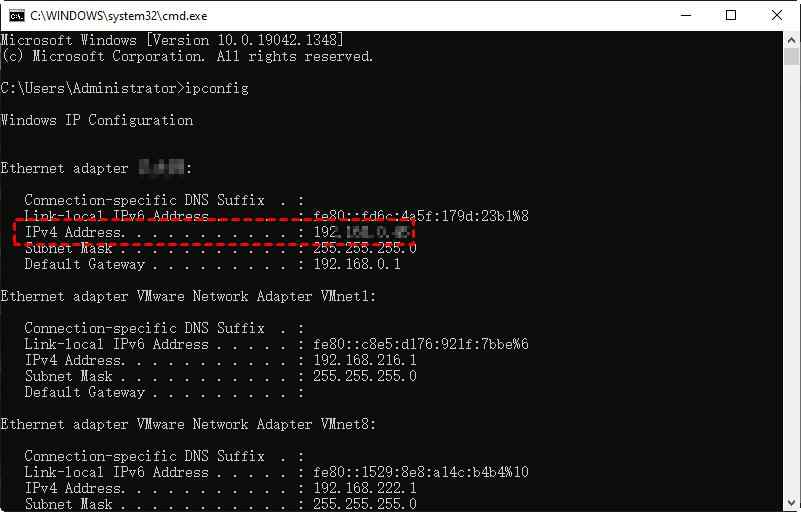
Step 2. Enter “ipconfig” and press Enter. A list of IP addresses will be displayed, and you should take note of the IPv4 Address.
Step 3. Next, enter “query user” and press Enter. The PC name will be presented for your reference.

Part 2. Remotely access another computer over the Internet
There are two distinct methods for remotely accessing another computer over the internet, depending on whether you are within the same network or not. Let’s explore both scenarios:
Case 1. Remotely access another computer within your network
To remotely access another computer within your network, you can open Remote Desktop Connection and follow the step to start remote access directly.
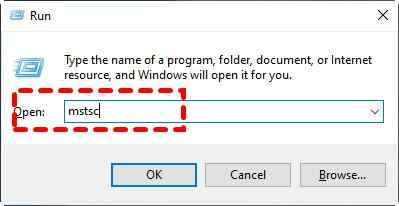
Step 1. On the Run dialog box, enter “mstsc” and press Enter. This action will initiate Remote Desktop Connection.
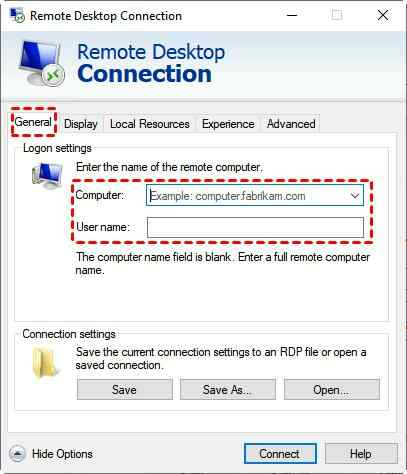
Step 2. Click on Show Options. Enter the IP address and name of the host computer in their respective fields. Then, click Connect.
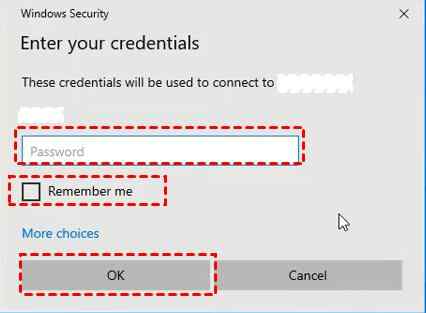
Step 3. A pop-up window will appear, input the password of the host computer and click OK.
Case 2. Remotely access another computer outside your network
To remotely access another computer within your network, you’ll need to set a static IP address for the computer you are trying to access and set up port forwarding before starting remote access.
Set a static IP address for the host computer
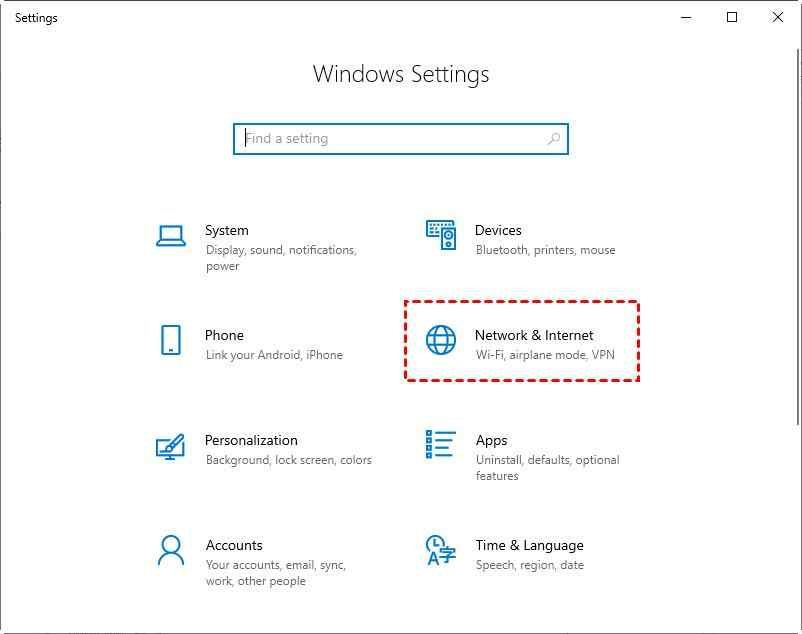
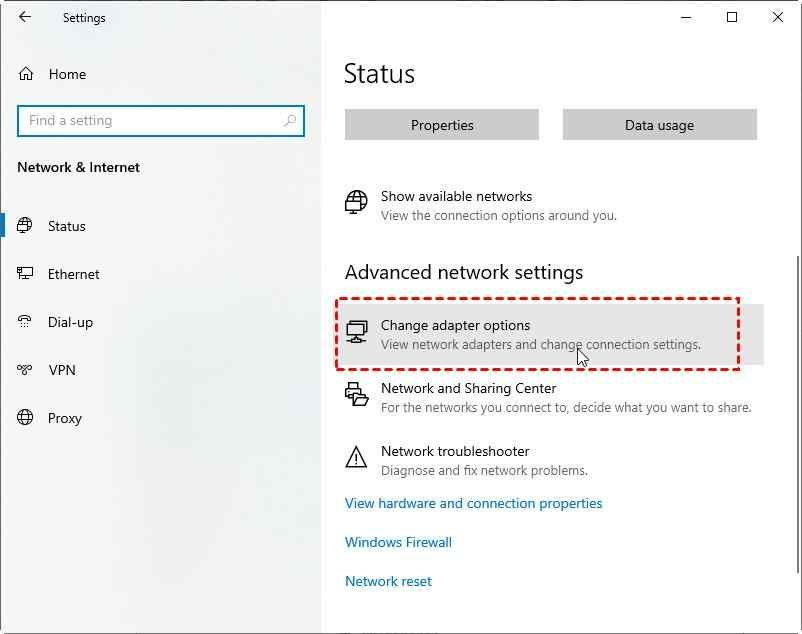
Step 1. Go to Start > Settings > Network & Internet.
Step 2. Click Change adapter options.
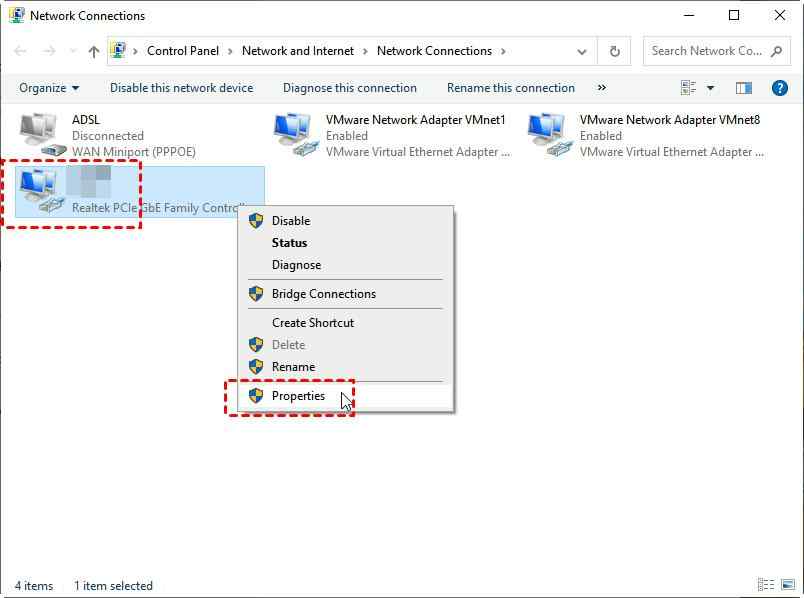
Step 3. Right-click on your network connection and select Properties.
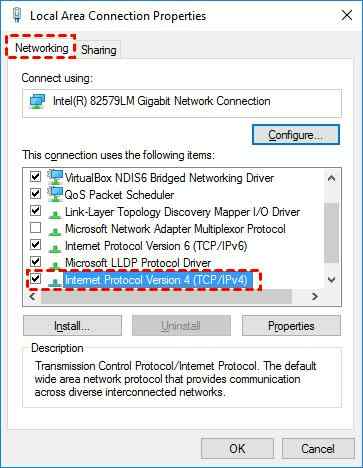
Step 4. Check the Internet Protocol Version 4 (TCP/IPv4) box, then choose Properties.
Step 5. Choose Use the following IP address and assign a static IP address. For example, if your router’s IP is 192.168.0.1 and the usable IP range is from 192.168.0.2 to 192.168.0.254, you can set the Static IP as 192.168.0.45. Set the Subnet mask to 255.255.255.0 and the Default gateway to the previously noted Default Gateway address.
Step 6. Choose Use the following DNS server addresses. Assign the Preferred DNS server to the same Default Gateway address. Set the Alternate DNS server to 8.8.8.8, the Google DNS.
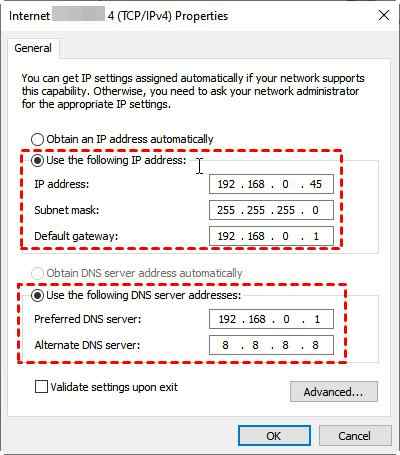
Step 7. Click OK to save the changes.
Configure port forwarding on the host computer
Step 1. Enter “what is my IP” in your browser’s search bar and make a note of your public IP address, ensuring to keep it confidential for security purposes.

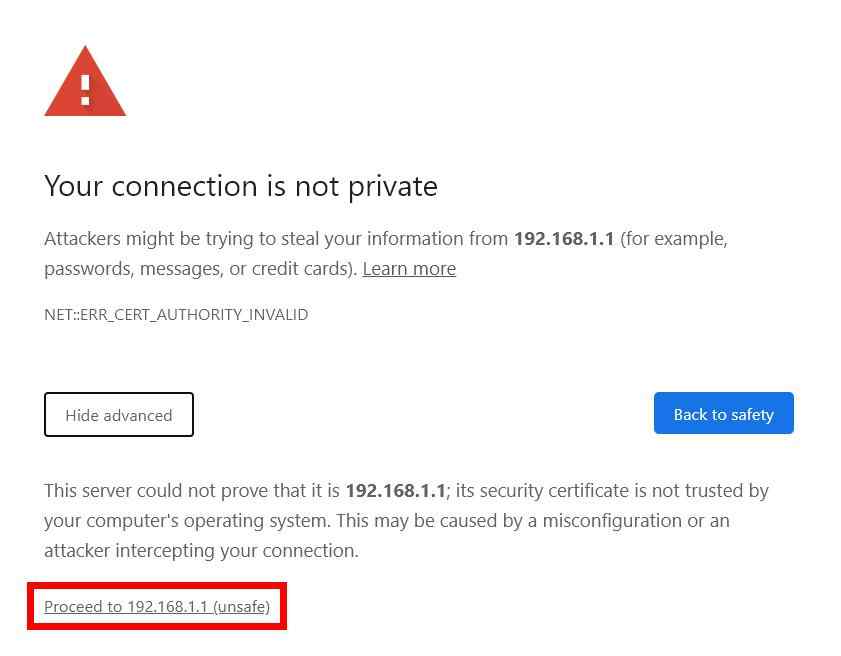
Step 2. Enter the IP address of your router in the web browser. If a privacy warning appears, select Advanced > Proceed.
Step 3. Enter the username and password for your router when prompted, and click Login.

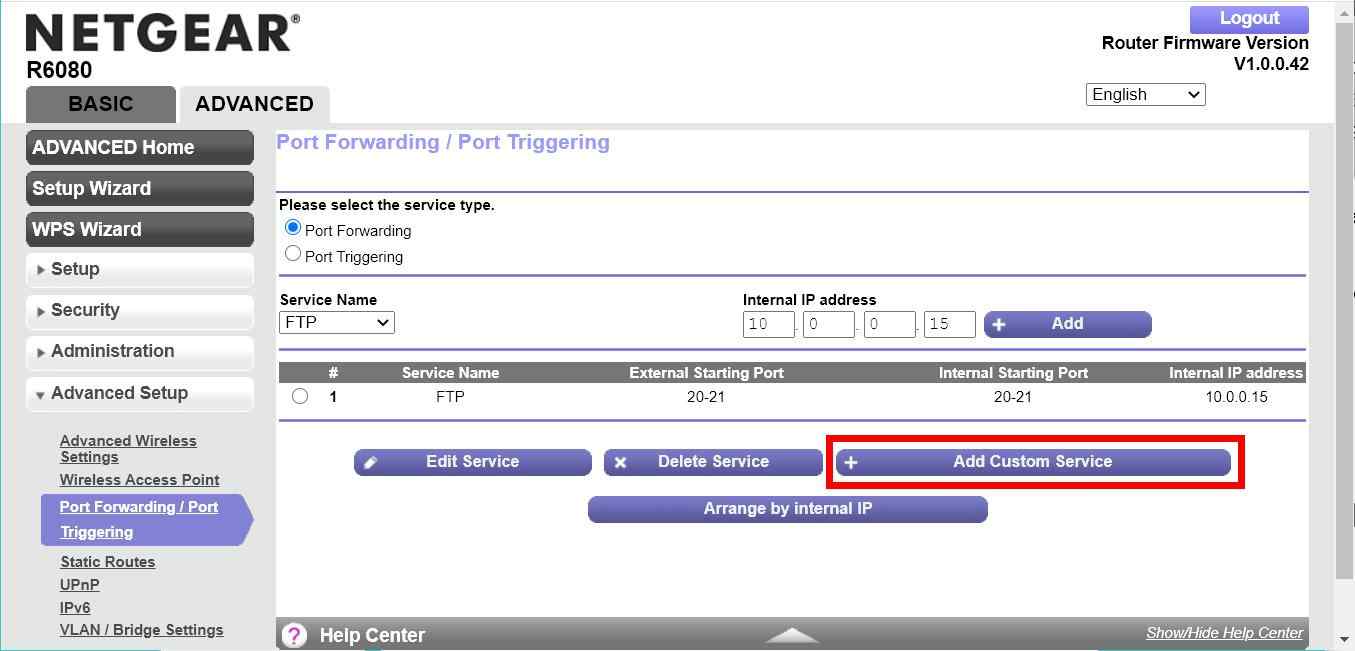
Step 4. Navigate to the Port Forwarding/Port Triggering section. To create a new port forwarding rule, select Add > Add Custom Service.
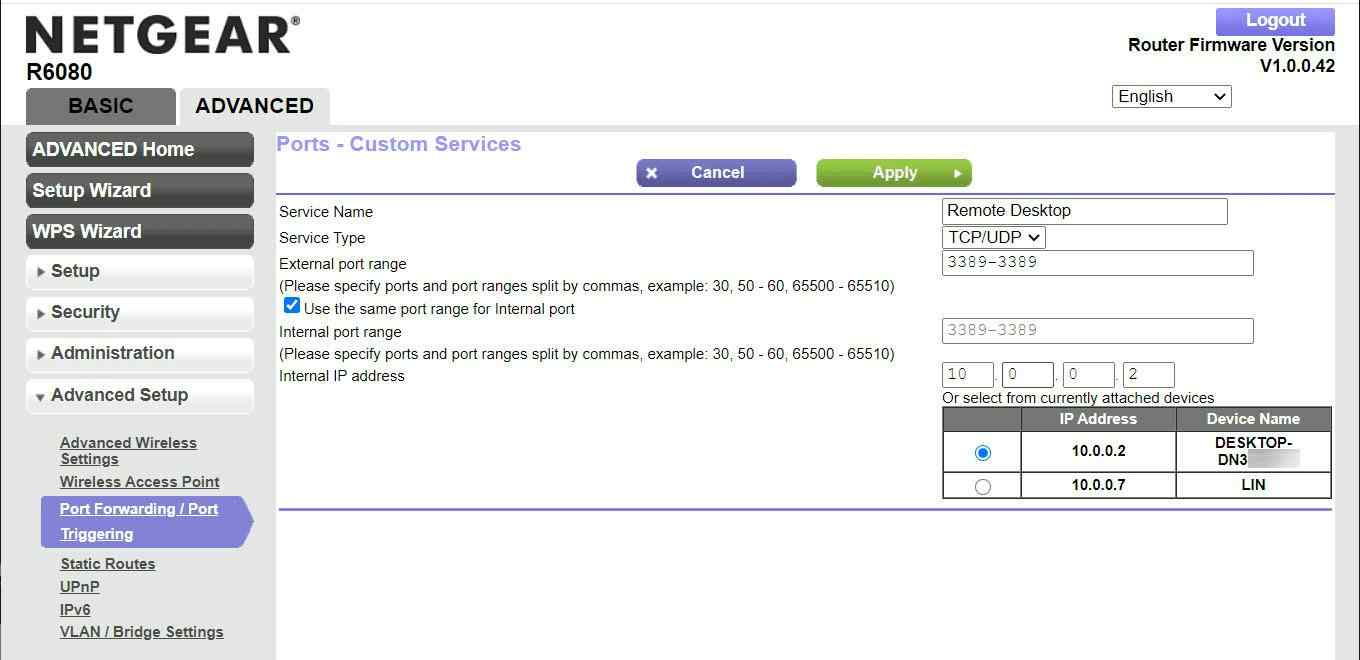
Step 5. Within the Port Forwarding interface, select the desired port to forward (if unsure, choose TCP/UDP or Both under Service Type). Specify the IP address of the device you wish to port forward and click Apply.
Once you have completed these configurations, you can open the Remote Desktop Connection app and initiate the remote access process as previously described.
Bonus tip: An easier Remote Desktop Connection alternative
If you find the process of using Windows Remote Desktop Connection a bit complex, there’s a simpler solution available: AnyViewer. AnyViewer is a free remote desktop software that offers convenient access and control of other computers, both within and outside your network, without the need for port forwarding. Here are some key advantages of AnyViewer over Remote Desktop Connection Remote Desktop Connection alternative:
- Compatibility: AnyViewer is fully compatible with Windows Home 10 & 11, whereas Remote Desktop Connection cannot be used to connect to Windows Home computers.
- Multiple concurrent sessions: AnyViewer allows multiple concurrent sessions for free, enabling simultaneous remote access to different computers. In contrast, Remote Desktop Connection supports only one remote session at a time.
- Additional features: AnyViewer offers extra features that go beyond the capabilities of Remote Desktop Connection. These include built-in chat functionality, the ability to reboot and reconnect to the remote computer, and more.
Give AnyViewer a try today and enjoy a seamless and user-friendly remote desktop experience.
Conclusion
In conclusion, this post provides the Remote Desktop Connection tutorial in Windows 10 and 11, introducing detailed guidance on setting up and accessing computers remotely. However, for users seeking a simpler alternative, AnyViewer offers a hassle-free remote desktop solution. With full compatibility, support for multiple concurrent sessions, and additional features, AnyViewer surpasses Remote Desktop Connection in ease of use and functionality. Whether within or outside your network, AnyViewer provides a seamless and enhanced remote desktop experience for Windows Home users. Explore AnyViewer today and enjoy effortless remote access to your computers.